How to Stop on Inline Skates: 5 Essential Braking Techniques for Every Skater

Stopping on inline skates involves several techniques, with the most common for beginners being the heel brake technique. This involves extending one foot forward, lifting the toe, and pressing the rubber brake firmly against the ground to create friction and slow down.
Welcome, fellow skate enthusiasts, to the Inlinex guide to mastering one of the most fundamental and vital skills in inline skating: stopping! Whether you’re just lacing up your first pair of Rollerblade Macroblades or you’re an experienced urban skater on your FR FRX 310s, knowing how to stop effectively and safely is paramount. It's not just about speed and tricks; it's about control, confidence, and most importantly, safety. Let’s dive into five essential braking techniques that will help you gain mastery over your skates.
Why Learning to Stop is Crucial
Imagine cruising down a path, feeling the wind, and suddenly, a pedestrian steps out, or you approach a busy intersection. Panic sets in if you don't know how to stop! Learning proper braking techniques isn't just a suggestion; it's a necessity for enjoying inline skating without fear. It allows you to:
- Prevent Accidents: Avoid collisions with people, objects, or traffic.
- Build Confidence: The ability to stop gives you the freedom to skate faster and explore more challenging terrain.
- Control Your Ride: Maintain command over your speed and direction at all times.
- Protect Yourself: Reduce the risk of falls and injuries. Remember to always wear your protective gear! If you haven't got yours yet, check out our FAQ page for gear recommendations.
Ready to boost your confidence and control? Take our Skate Quiz to ensure you're on the right wheels for your style!
5 Essential Braking Techniques for Inline Skaters

We’ll cover techniques ranging from beginner-friendly to more advanced, ensuring there’s a stop for every skill level and situation.
1. The Heel Brake Stop (Beginner-Friendly & Most Common)
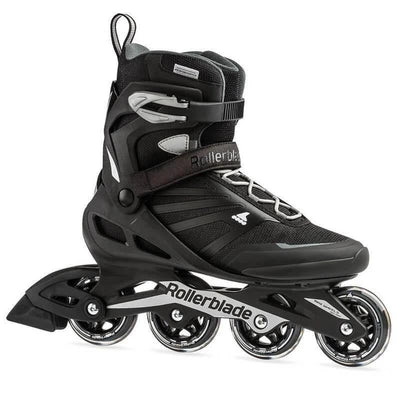
The heel brake is your best friend when you're starting out. Most recreational and fitness skates, like the Rollerblade Macroblade series, come equipped with a removable rubber brake pad attached to the heel of one skate (usually the right). This is the safest and most reliable stop for new skaters.
How to Execute the Heel Brake Stop:
- Glide and Prepare: While gliding forward, shift your weight slightly onto your non-braking foot (the one without the brake).
- Extend Braking Foot: Gently push your braking foot forward, keeping the skate flat on the ground initially.
- Lift Toe, Press Heel: Lift the toe of your braking foot, so only the rubber heel brake makes contact with the ground. Keep your knee slightly bent and push down firmly but smoothly on the brake.
- Maintain Balance: Keep your arms out for balance, looking forward, not down at your feet. Your non-braking foot should remain underneath you, slightly bent, acting as your anchor.
- Practice Gradual Pressure: Start with light pressure to slow down, then increase it for a quicker stop. Avoid slamming the brake down.
Pros:
- Easiest to Learn: Intuitive and effective for beginners.
- Reliable: Works well on various surfaces, even slightly wet ones.
- Safe: Provides controlled deceleration.
Cons:
- Slower than Advanced Stops: Not ideal for sudden, emergency stops at high speeds.
- Can Wear Out: The brake pad will eventually need replacement.
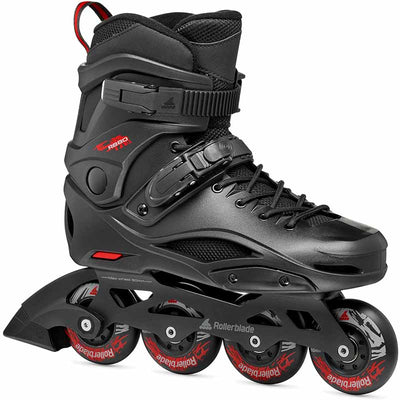
- Not on All Skates: Many urban and aggressive skates (like the FR FRX or Flying Eagle F5S Eclipse) don't come with a heel brake, as they are designed for more advanced maneuvers.
Pro Tip: Don't look down! Keep your head up and look where you want to go. This helps maintain balance and awareness of your surroundings.
2. The T-Stop (Intermediate)
The T-Stop is a fundamental skill for skaters who want to move beyond the heel brake. It uses friction created by dragging one skate perpendicularly behind the other, forming a "T" shape. It's a great intermediate stop that offers more control and can be performed without a heel brake.
How to Execute the T-Stop:
- Establish Balance: Glide on one foot (your standing/balancing foot).
- Position Dragging Foot: Bring your other foot (your dragging foot) directly behind the standing foot, perpendicular to it, forming a 'T'.
- Apply Gentle Pressure: Lightly touch the wheels of your dragging foot to the ground, parallel to your direction of travel but perpendicular to your standing foot. The wheels should be almost scraping sideways.
- Increase Pressure: Gradually apply more pressure through your dragging foot, allowing the wheels to scrub sideways against the ground. Keep your weight primarily on your standing foot.
- Stay Upright: Bend your knees, keep your core engaged, and maintain your balance over your standing foot.
Pros:
- No Special Equipment: Can be done on any inline skate, including urban skates like the Powerslide Next.
- Versatile: Effective for moderate speeds and situations where a heel brake isn't practical.
- Good Control: Allows for speed modulation.
Cons:
- Wears Wheels: Can cause uneven wear on the wheels of your dragging foot. Rotate your wheels regularly!
- Requires Practice: Mastering balance and pressure takes time.
- Less Effective at High Speed: Can be difficult to execute safely and effectively for very fast stops.
Pro Tip: Start practicing the T-stop at slow speeds in a wide-open area. Focus on keeping your weight over your standing foot; the dragging foot is just for friction, not for bearing your full weight.
3. The Plow Stop (A-Frame Stop or Snowplow Stop) (Intermediate)
Inspired by skiing, the Plow Stop (sometimes called an A-Frame or Snowplow Stop) involves pushing both feet outwards and forwards, creating an "A" shape with your skates. This technique uses the inside edges of your wheels to create friction, slowing you down effectively.
How to Execute the Plow Stop:
- Bend Knees: Start by bending your knees deeply and leaning slightly forward.
- Push Outwards: Gently push both feet outwards, away from each other, while keeping your toes pointed slightly inward (pigeon-toed).
- Engage Edges: Feel the inside edges of your wheels digging into the ground.
- Apply Pressure: Gradually increase the pressure outwards and forwards, allowing your skates to scrub against the ground. Your body should form a stable, low stance.
- Control Speed: Adjust the outward pressure to control your deceleration.
Pros:
- Effective for Moderate Speeds: Great for controlled stops or slowing down on slopes.
- Good Control: You can easily modulate the amount of braking power.
- Stable: The wide stance offers good stability.
Cons:
- Can be Awkward: Requires good knee bend and leg strength.
- Can Strain Legs: Prolonged or aggressive plow stops can be tiring.
- Not for Quick Stops: While effective, it’s not the fastest stop for emergencies.
Pro Tip: Think about pushing your heels out and your toes in. Keep your knees over your toes and your hips low for maximum stability and power. This stop is excellent for skates with good ankle support, like the Flying Eagle F5S Eclipse.
4. The Power Slide (Advanced)
The Power Slide is a stylish and highly effective advanced braking technique. It involves turning one skate sharply perpendicular to your direction of travel while leaning heavily into the turn, causing all wheels to slide across the surface. This stop requires significant practice, balance, and edge control.
How to Execute the Power Slide:
- Build Speed: Start with moderate speed, as momentum helps.
- Prepare Stance: Get low, bend your knees, and shift your weight slightly forward.
- Initiate Turn: Turn your leading foot sharply (e.g., 90 degrees) into the direction you want to slide. Your body should counter-rotate slightly.
- Lean In: Lean heavily into the turn, allowing the inside edges of your wheels to dig in and then slide. Your trailing foot should follow, also turning perpendicular or slightly behind.
- Maintain Balance: Keep your core strong, arms out, and look towards your sliding direction.
Pros:
- Very Effective: Can stop you quickly, even from high speeds.
- Stylish: Looks impressive when executed correctly.
- No Heel Brake Needed: Ideal for urban and freestyle skaters.
Cons:
- Difficult to Master: Requires significant practice, balance, and edge control.
- High Wheel Wear: Causes extreme wear on your wheels, especially on the inner edges.
- Risk of Falling: Higher chance of falling if not executed properly.
Pro Tip: Practice initiating small, controlled slides at slow speeds before attempting a full power slide. Focus on carving a sharp turn and then pushing into the slide. Skates like the FR FRX or Powerslide Next are excellent for practicing power slides due to their responsive frames and good ankle support.
5. The Spin Stop (Advanced)
The Spin Stop, also known as a Parallel Stop with a spin, is another advanced technique that utilizes a rapid 180-degree spin to bring you to a halt. It's quick, graceful, and highly effective for slowing down or stopping suddenly.
How to Execute the Spin Stop:
- Build Momentum: Start with a comfortable speed.
- Initiate Turn: Shift your weight onto one foot (e.g., left foot) and begin a wide, sweeping turn in the opposite direction (e.g., right).
- Bring Feet Parallel: As you complete about half of the turn, bring your other foot (right foot) parallel to your leading foot, positioning them close together.
- Pivot and Stop: Continue the turn rapidly, pivoting on your wheels to complete a 180-degree spin. As you spin, the sideways friction of your wheels will bring you to a quick stop. Your body should face the opposite direction of your initial travel.
- Bend Knees: Keep your knees deeply bent throughout the maneuver to absorb impact and maintain balance.
Pros:
- Quick and Effective: Excellent for sudden stops and changing direction.
- Dynamic: Looks skilled and confident.
- Versatile: Can be adapted to various situations.
Cons:
- Demanding on Balance: Requires excellent balance and coordination.
- Requires Space: Needs a bit of room to execute safely.
- Can Cause Falls: If not executed smoothly, it can lead to a loss of balance and a fall.
Pro Tip: Practice your turns and pivots extensively at slower speeds. The key to the spin stop is a smooth, continuous motion. Focus on keeping your upper body aligned with your hips as you spin. Skates with good maneuverability, like the FR Skates range, are ideal for practicing this technique.
General Tips for Mastering Your Stops

- Practice, Practice, Practice: Consistency is key. Dedicate time in each session to practice your stops.
- Start Slow: Always begin practicing new techniques at very slow speeds in a safe, open, and flat area.
- Wear Protective Gear: Helmets, wrist guards, elbow pads, and knee pads are non-negotiable. Falls happen, especially when learning new skills.
- Look Up: Keep your head up and look where you want to go. Your body tends to follow your gaze.
- Bend Your Knees: A low center of gravity improves stability and control for all stops.
- Rotate Your Wheels: Especially for T-stops and Power Slides, regular wheel rotation will extend their lifespan and ensure even wear.
- Don't Panic: Stay calm. If you feel yourself losing control, try to fall safely by rolling or sliding rather than stiffening up.
Learning how to stop on inline skates is a journey, not a destination. Each technique offers a different level of control and is suited for various situations. Start with the heel brake, master the T-stop, and then gradually work your way up to more advanced maneuvers like the plow stop, power slide, and spin stop. Your confidence will soar, and your skating adventures will become even more enjoyable.
Ready to Roll Safely?
Now that you're armed with the knowledge of how to stop, it's time to put it into practice! For all your inline skating needs, from beginner-friendly skates with heel brakes to high-performance urban models, Inlinex has you covered. Browse our extensive collection and find the perfect pair to help you stop with confidence.
Don't forget to Take our Skate Quiz to find your ideal skates, and see all our FAQ for more helpful tips!